NewChallengerStore.com
Dodge
Challenger
Stainless Front Hood Plate
Instructions
Parts: #
ACC-153002, ACC-153003 and ACC-153004
Your cover comes to you with a protective liner. Do not remove liner until final installation.
1. Thoroughly clean the
area of the hood to be mounted with alcohol to remove any road grime
and wax. Then swipe the entire area with the adhesive promoter
provided.
This will insure a nice permanent bond of the panel to the hood.
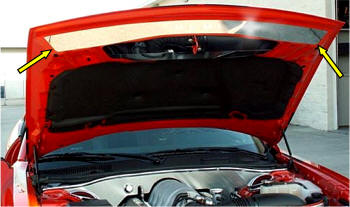
2. Mark the hood at the very center using the hood catch bar as a guide.
3. Mark the new panel at
the very top edge also at center. Place the new panel at these two
marks so that you will be able to see just how you will need to
shape the panel to the hood. The panel is made of a 20ga thin
stainless and will allow you to gently roll and shape the panel by
hand until you have achieved a nice flush sitting contour of the
hood.
You will notice that the hood has a soft contouring shape to it and
it is IMPORTANT to match the shape making the panel look even on
both sides.
This process will take SEVERAL attempts to make it sit just right so
you need to be patient.
4. Once you have achieved a nice fitting contour hold the panel in position and add a couple of marks to the panel and hood so that you will be able to set the panel at the exact same position every time you practice placing it. This will allow you to set it perfectly once you are ready to permanently set the panel.
5. Now that you are ready to
set the panel simply remove the red release liner from the
attachment tape on back of the panel and carefully line the panel up
to your positioning marks. Once you are in position set the panel
from the center working outward pressing firmly to match the contour
and shape of the hood and also to finally set the panel in place.
Remove the protective liner to finish the installation.
Questions? Give us a call at 352 688
8160 M-F
For Help - please call 352 688 8160 or email
us at admin@NewChallengerStore.com